
Welcome to what is going to be a very thorough and detailed article. I am going to break down exactly what you need to do to retrofit a BM53 Radio, Auxiliary Input, and SIRIUS XM radio into your BMW E39 5-series. All of the components used in this DIY are Genuine BMW. No Chinese aftermarket garbage head units here!
DISCLOSURE: This post may contain affiliate links, meaning when you click the links and make a purchase, we receive a commission.
What am I Doing? I am adding a hard-wired auxiliary input, SIRIUS XM, and the most contemporary BM53 radio to my E39 M5. I will first retrofit the radio, then SIRIUS, and then auxiliary. I also wired the XM antenna and 3.5mm cable into the car.
Objective: Update all of our car’s old I-Bus hardware to the latest possible I-Bus compliant components to support the most modern features possible. This includes, but is not limited to, SIRIUS satellite XM radio, auxiliary input, and MP3 ID3 tags for the CD changer.
Applicable Vehicles: 1997-2003 BMW E39 5-series: 523i, 525i, 528i, 530i, 535i, 540i, M5. 1994-2001 BMW E38 7-series: 730i, 740i, 740iL, 750iL. E53 BMW X5. 1999-2006 BMW E46 3-series: 323i, 325i, 328i, 330i, M3. More models may be supported by the product(s) featured in this post, such as the E83 X3, etc. This DIY requires a factory navigation-equipped vehicle
Subject Vehicle: 02/2000 BMW E39 M5, DE93 USA.
Prerequisites: In order to support auxiliary input, you need one of the more modern BM53 radios. If your car is a 09/2001 production and later, your car already has a BM53 radio. However, it may not be late enough to support auxiliary. Refer to the BM53 radio part numbers below for information about support. You will need to check the part number in your car to the number in the list below. The BM53 radio part number is on a white sticker on the side of the unit. The radio is the silver ‘box’ located closest to the rear driver’s side tail light in the trunk. If your car was produced before 09/2001, you have a C43 radio. None of the C43 radios support auxiliary.
In order to support SIRIUS XM radio, you need a few pieces of hardware. Firstly, your car needs to be equipped with navigation to follow this DIY. You need the MKIV navigation computer, and you should have the 16:9 widescreen BMW monitor, though it is not a technical requirement. A post about upgrading those components can be found here. You also need a BM53 radio new enough to support SIRIUS, so refer again to the BM53 radio part numbers below. The BM53 radio part number is on a white sticker on the side of the unit. The radio is the silver ‘box’ located closest to the rear driver’s side tail light in the trunk. If your car was produced before 09/2001, you have a C43 radio. None of the C43 radios support SIRIUS XM.
Digital vs Analog DSP: BMW used two types of DSP Digital Sound Processing cables. Cars produced through 8/31/2001 came with the C43 radio module, and digital DSP. The digital DSP cable is a thin, black coaxial cable that is responsible for carrying all of the audio signals. The cable plugs into the top of the amp directly. The CD changer (if equipped) used this coaxial cable to output audio to the amp. When the BM53 was introduced on cars with a build date from 09/01/2001, digital DSP was replaced with analog DSP. The analog DSP cable is a 6-pin cable that feeds the BM53 radio instead of the amp directly. It is possible to install a digital DSP cable on the later, analog DSP equipped cars. Just connect the cable to the top of the amp (it only fits in one place) and then to whatever device you want to feed the amp with, such as a CD changer, or BlueBus.
BM53 Radio Support with Part Numbers
65126904213 No aux input, no Sirius, no MP3
65126904214 No aux input, no Sirius, no MP3 (re-manufactured part number)
65126919080 No aux input, no Sirius, no MP3
65126919081 No aux input, no Sirius, no MP3 (re-manufactured part number)
65126922512 Aux input, no Sirius, no MP3
65126922513 Aux input, no Sirius, no MP3 (re-manufactured part number)
65106933089 Aux input, no Sirius, no MP3
65106933090 Aux input, no Sirius, no MP3 (re-manufactured part number)
65126927910 Aux input, Sirius, no MP3
65126927911 Aux input, Sirius, no MP3 (re-manufactured part number)
65126943449 Aux input, Sirius, no MP3
65126943450 Aux input, Sirius, no MP3 (re-manufactured part number)
65126964398 Aux input, Sirius, no MP3
65126964399 Aux input, Sirius, no MP3 (re-manufactured part number)
65126972662 Aux input, Sirius, no MP3
65126972665 Aux input, Sirius, no MP3 (re-manufactured part number)
65126976961 Aux input, Sirius, MP3
65126976962 Aux input, Sirius, MP3 (re-manufactured part number)
65126988275 Aux input, Sirius, MP3
65126988276 Aux input, Sirius, MP3 (re-manufactured part number)
Parts Required: Depending on what you’re trying to do!
PART NUMBER DESCRIPTION PRICE
65126988275 BM53 Radio to Support MP3, Aux, and SIRIUS XM (NLA) price —
65120439436 SIRIUS XM Receiver $320.24
61126913957 C43 to BM53 Radio Harness Adapter * $88.11
61126913955 C43 to BM53 Radio Antenna Adapter * $25.95
61126924785 C43 to BM53 Radio CD Changer Adapter * $55.23
65128364756 BM53 Radio to SIRIUS Module Cable ** $47.53
84110150526 SIRIUS Module to CD Changer Slave Cable $8.77
82110149390 Auxiliary Input Cable $36.45
82110149391 Auxiliary Input Cable $35.35
84110141975 SIRIUS Installation Bracket Kit (Bracket, bolts, zip ties) (NLA) price —
51498166702 Trunk Carpeting Expanding Rivets $1.95
Amazon SIRIUS XM Antenna $18.88
Amazon XM Antenna FAKRA Adapter $12.99
Amazon Additional XM Antenna FAKRA Adapter (If Needed) $9.40
*. For vehicles produced in or before August, 2001. Needed for BM53 radio retrofit.
** Vehicles with digital DSP will need this cable.
*** Part “No Longer Available.” Good luck.
**** If broken or found to be missing during installation process.
***** For navigation-equipped vehicles produced in or after 09/2002.
The above prices are quoted from ECS Tuning and Amazon. Other vendors may vary. Figures updated April, 2022.
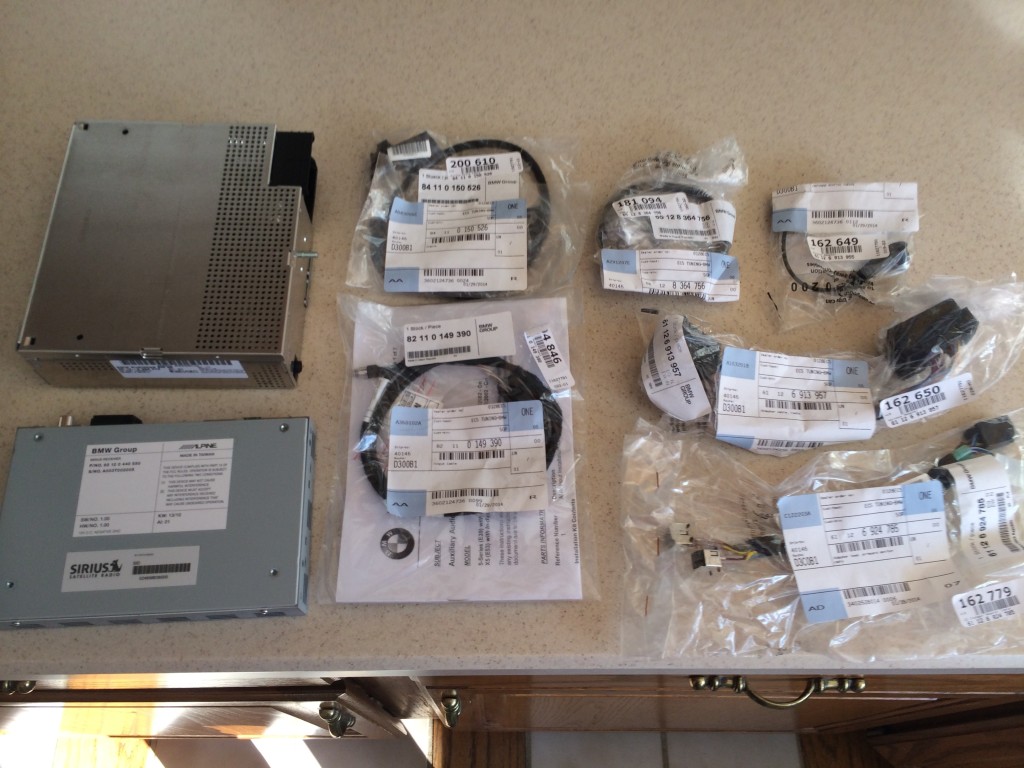 Above are all of the parts that I needed to complete my job. I needed all of the adapters to go from the C43 radio to BM53, plus the BM53 radio, SIRIUS module, and auxiliary cable.
Tools Required:
8mm socket
10mm socket
3 and/or 6 inch socket extension
Ratchet
Flat/phillips screwdrivers, medium size
Jewelry-sized flat head screwdriver
Pry tool would be helpful, but a screw-driver works
Cost: $30-$2,000 (depending on what you already have, and what you want)
Difficulty: Moderate
Time Required: 15 minutes to 3 hours (depending on what you’re trying to do)
Procedure:
Please read this entire article. Also watch my video, located below. This is a loose description of that very in-depth video.
Check prerequisites. Note that for SIRIUS you need MKIV navigation and a supporting BM53 radio. Note that adding auxiliary only allows you to keep a MKII/MKIII navigation computer.
Disconnect your battery’s negative cable. It’s under the trunk carpeting in an M5, and behind the trap door in the trunk on the right in a standard E39 5-series.
We will start by removing the CD changer. On the side closer to the back seat, there are two phillips screws. Loosen those, lift up, and pull out. There will be two wires in the bottom of the CD changer. One is a 3-pin connector, that is IBUS power and data. The other will either be a six pin connector (analog DSP) or a small black coaxial wire (digital DSP). Remove all wires and set the CD changer aside.
Retrofitting the BM53 radio. If you’re just upgrading your existing BM53 radio to a new one that supports more functions, it’s plug and play. To upgrade to the BM53 radio from the C43 is not a big job. You just need the adapting harnesses listed in the parts list above. Firstly, remove the C43 radio with its bracket using an 8mm socket and ratchet. Unplug all of the cables from it.
Install the antenna adapter (61126913955) in-between the BM53 radio, and the old antenna harness in the car. This only goes on one way, so snap it into place.
Install the main harness adapter (61126913957) in-between the BM53 radio and the car’s original harness. This too only goes on one way, so snap it into place.
Install the CD changer adapter (61126924785) in-between the BM53 radio and the car’s original harness. The white/black end of this harness only goes into the BM53 one way, so snap them into the BM53 radio. The metal ends can connect to the car’s existing wiring multiple ways. My video, which shows the correct way to connect these cables, is below. Watch that, or plug and play until things work as expected. Remember to test navigation direction volume and tape audio too.
Don’t bother bolting the new radio in yet if you plan on installing SIRIUS or auxiliary. We will now move onto SIRIUS.
Install the SIRIUS module in its bracket using the four included phillips screws. Then use the body nuts and included bolts to bolt the bracket and module into the car against the DSP amp.
Let’s move onto the power and DSP wires for the SIRIUS module. The 3-pin that was previously connected to your CD changer now needs to plug into your SIRIUS module. If you did not previously have a CD changer, use the CD changer pre-wiring wires. If you have analog DSP, plug that 6-pin connector into the SIRIUS module as well. If you have digital DSP, leave that cable hang, and get the new DSP cable (65128364756) and install that. One end goes into the car’s original harness for the radio (metal plug) and the other goes into the square port on the SIRIUS module.
Installing the CD changer. To obtain control of our CD changer, we need the CD changer slave cable (84110150526). Plug the connector with the lever into the SIRIUS module, and the other two ends (3-pin and 6-pin) into the bottom of the CD changer. This will restore original functionality to that. Note that we have now ‘converted’ the CD changer to analog DSP. If you wish to retain digital DSP, you can use the old digital DSP cable (65128361177) to connect the CD changer directly to the amp.
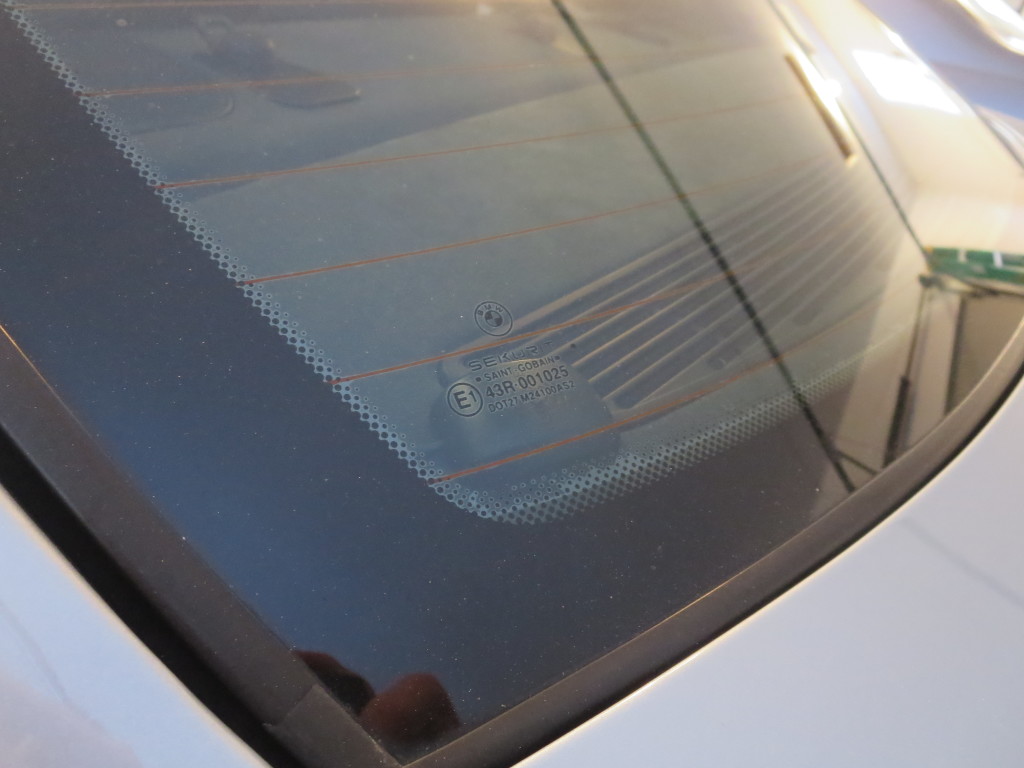
Installing the SIRIUS antenna. You will need the first or both FAKRA adapters listed above to make the antenna work with the SIRIUS module. They only go together one way, so hooking it up won’t be a problem. You can install your antenna anywhere you want to. SIRIUS XM states that it needs a clear view of the sky in order to function I routed my antenna up on top of the rear parcel shelf against the glass in the corner, and hid the wires behind the C-pillar trim. It works perfectly, even in my garage with the door shut. You can route the wire into the car back by the back seat behind the carpeting- there is a passage for other wires there. Then hide it behind the back seat’s backrest, and then under the C-pillar. Tie the extra wire up with a zip tie, and plug the antenna connector into the SIRIUS module.
SIRIUS XM antenna installed and hidden on the rear parcel shelf, against the glass. I have lost no quality of service, even in my garage with the door down!
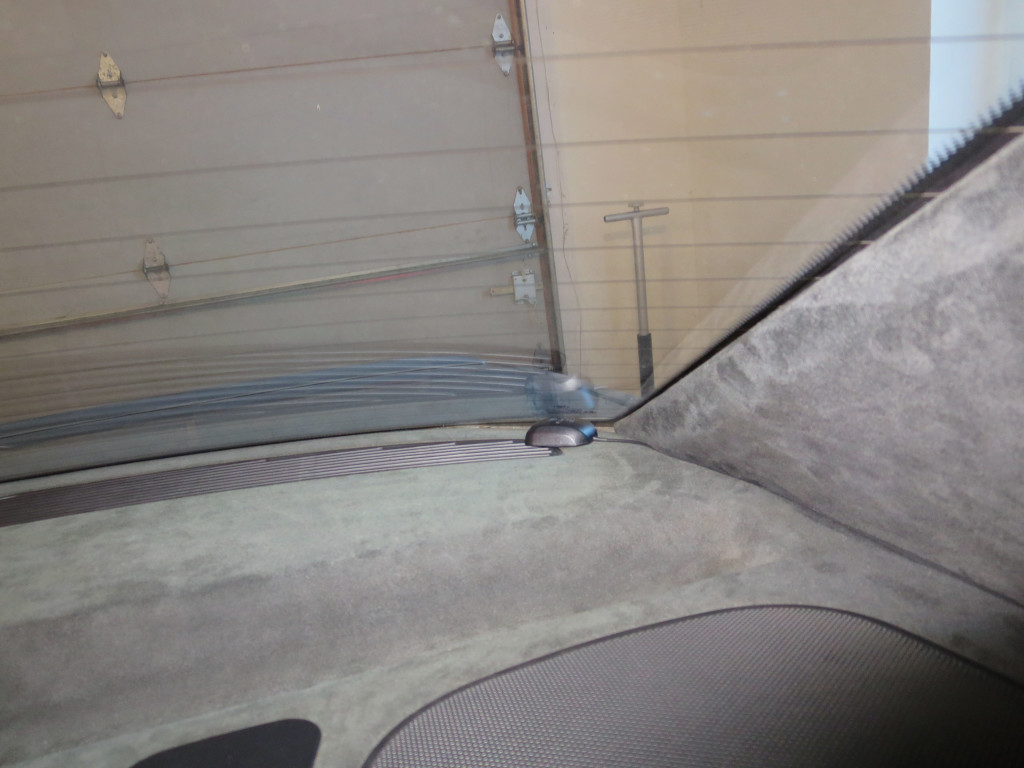
SIRIUS XM antenna barely visible, with the wire hidden behind the C-Pillar, and tucked under the rear parcel shelf.
Let’s now install the auxiliary input cable. Take the cable (82110149390) inside to a desk, with a good light. We need to take some pins out of this connector and transfer them to the C-block connector that actually plugs into the BM53 radio. We need to do this because the BM53 only has room for one black 2×6 (12) pin connector, not two. So we’ll take the three pins from the auxiliary cable and install them into the corresponding slots on the black connector in the car (they will be empty and ready for these wires). On the following diagram, we are working with connector C (X13649) and pins 3, 4, and 10. Pin 10 is ground, and is brown/white. Pins 3/4 and red/white and blue/white and carry right and left channel audio signals. My video below better details how to move the pins over, but it’s pretty simple. Slide half of the black connector off, revealing how the pins are placed into the connector. Depress the sides of the pins through the windows with a very small flat screwdriver, and gently pull the wires to remove them. Remember where they go, or reference the diagram below again. Install these pins in the same place on the black connector in the car, and then plug the connector back into the BM53 radio. Simply take your time, be careful, and be sure about where you’re putting them. Run the auxiliary cable up into the car. I chose to go up the driver’s side, but this depends on where you want the end 3.5mm cable to reside. I chose the glovebox. Get the cable into the car the same way you did the with SIRIUS antenna, or go behind the driver’s side trunk carpeting, and get it into the back-seat area through the hole that other wires use. If you’re going for the glovebox, I would recommend once you get the cable in the back seat, run it under the bottom seat cushion, which simply pulls straight up and out, and then under the door sill strips, B-pillar, and then finally under the dashboard and into the glovebox. This can be done with flat head screwdrivers, and you’ll absolutely never see or know that the cable is there. We now need to program the BM53 radio into USA area in order for certain features to work. To do this, make sure that everything is connected, and that you’re ready to plug the battery back in. Don’t worry about bolting everything down yet, we’ll make sure it all works first. Plug your battery back in and head to the driver’s seat. We have to put the BM53 radio into program mode to select the proper area. Within a second after hitting the power button, press and continue to hold the SELECT button on the navigation display. Within about 5 seconds, you’ll be in the menu looking at the serial number of the radio. Use the CD track skip buttons (< and >) to cycle through the different options. When you get to area or location, press numbers 1 or 2 on the left of the 16:9 display until USA is displayed. Once it is, press the radio power button (volume knob) to save these settings.
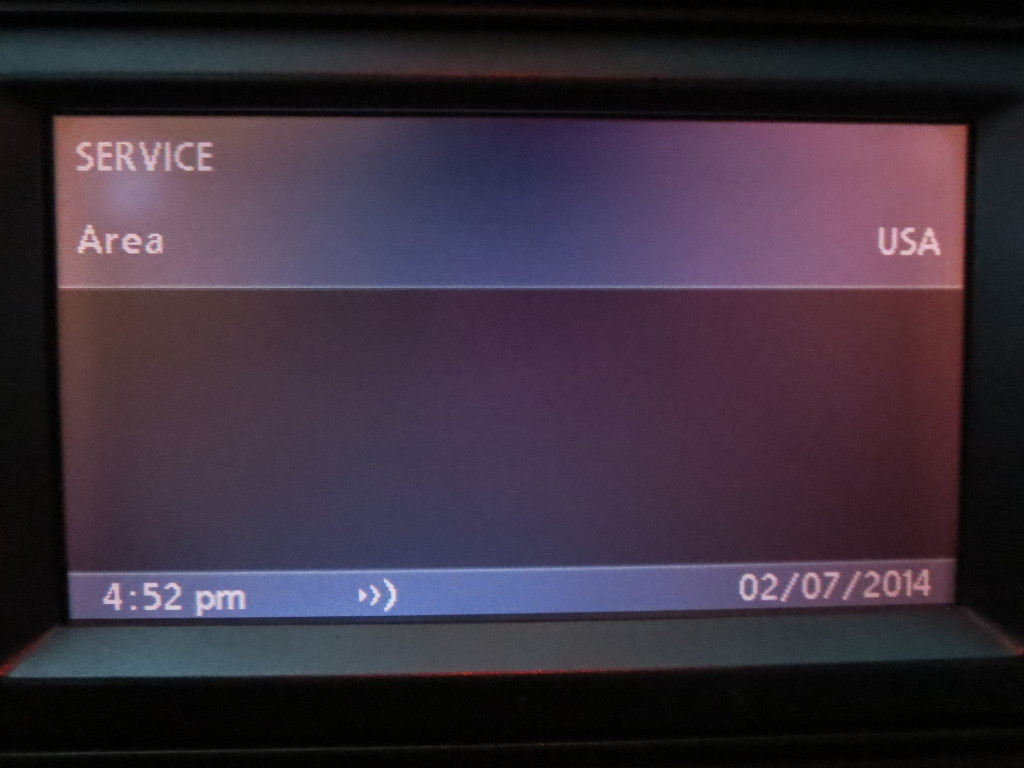
Service Menu of BM53 radio. Set the Area to USA to enable SIRIUS satellite radio.
Note that the GAL option in the service mode is speed-variable volume on a scale of 1-6. If you want this system to be aggressive, select a higher number using the preset buttons 1-6.
09/2002 Production and Later Navigation-Equipped Cars:
You already have the correct BM53 radio part number for aux. You already have the pins wired into the radio in the trunk. You already have the wire run up through the car. Lucky you! All you need to do is remove the 16:9 display bezel, the display itself, and find the currently un-used 3-pin connector located somewhere behind the display in the dashboard. Plug in the aux kit (82110149391) and install the female 3.5mm aux adapter anywhere you like in the vehicle. It comes with screws and a faceplate to mount in your glovebox, if you’re interested in doing it by the book. You’ll just need a drill bit to drill one larger hole for the aux input port, and two smaller pilot holes for the included screws.
Troubleshooting: Test out your system! Turn on your radio, and start hitting the MODE button. Depending on what you installed, you’re looking for different things. If you installed both auxiliary and SIRIUS, you should see CD, TAPE, FM, SIRIUS, and AUX. Note that AM is selected by pressing the dedicated AM button above the MODE button. If you are missing any of the above inputs, or what you expected, there is one probable place for an issue. This is where the CD changer adapter cable (61126924785) plugs into the car’s existing wiring harness, since you probably upgraded from the C43 radio. You may have one or both of those connectors utilized. Note that they are not keyed connectors can be switched, and turned around within another. Try all different combinations until you find the modes that you’re looking for. If AUX is not showing up, make sure that your pins are in the correct places, and that they are pushed down into the radio pins all of the way and thus making a solid connection. The radio should see AUX even if there is no source plugged into or playing to the 3.5mm cable. Please feel free to contact me if there absolutely isn’t anything you can do to get your system to work. Please use ryan@e39source.com for inquiries. Please understand, however, that I am only experienced doing this in a 02/2000 E39 M5, but I will do my best to assist with other cars and other setups.
SIRIUS Activation: When you first select your SIRIUS input, make sure that your antenna does have a very clear view of the sky, since you need to activate it. On the module itself, you’ll see either an SID number or ESN number. This is the number you’ll need to give to SIRIUS over the phone or online when you activate your account and subscription plan. You want channel 184 while they activate. Within about 5 minutes, you should have SIRIUS XM radio in your car!
SIRIUS XM radio view mode when on a station.
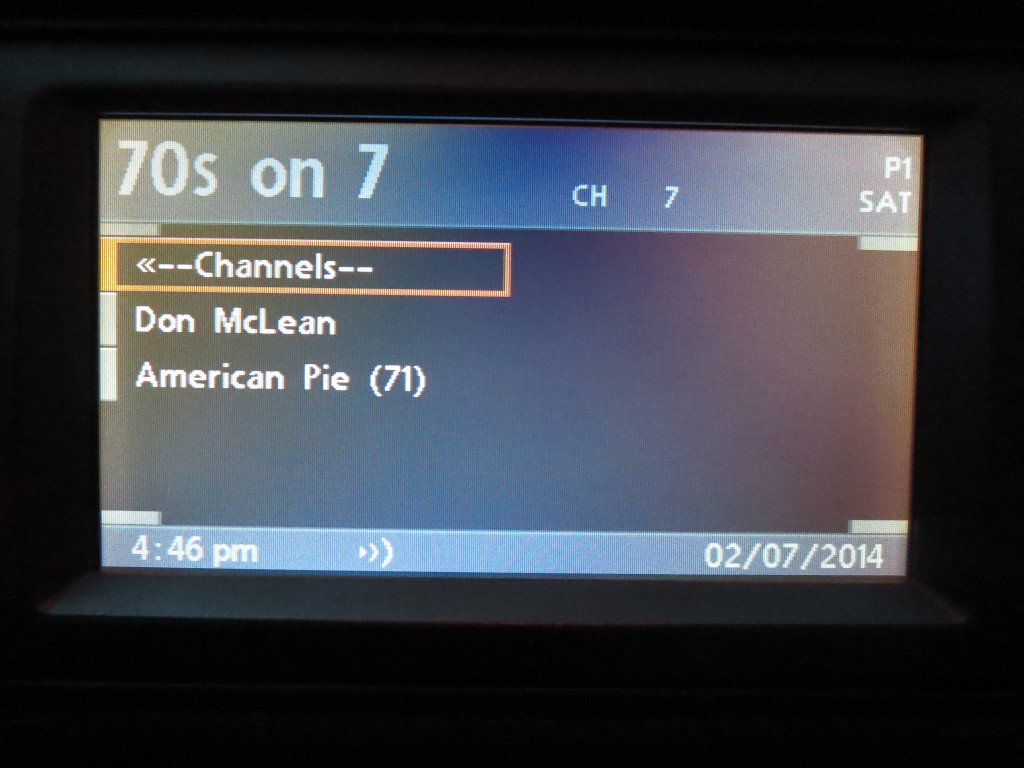
SIRIUS XM radio view when in category view. Channels within the category are displayed here, and will scroll to second page if necessary with » selection.
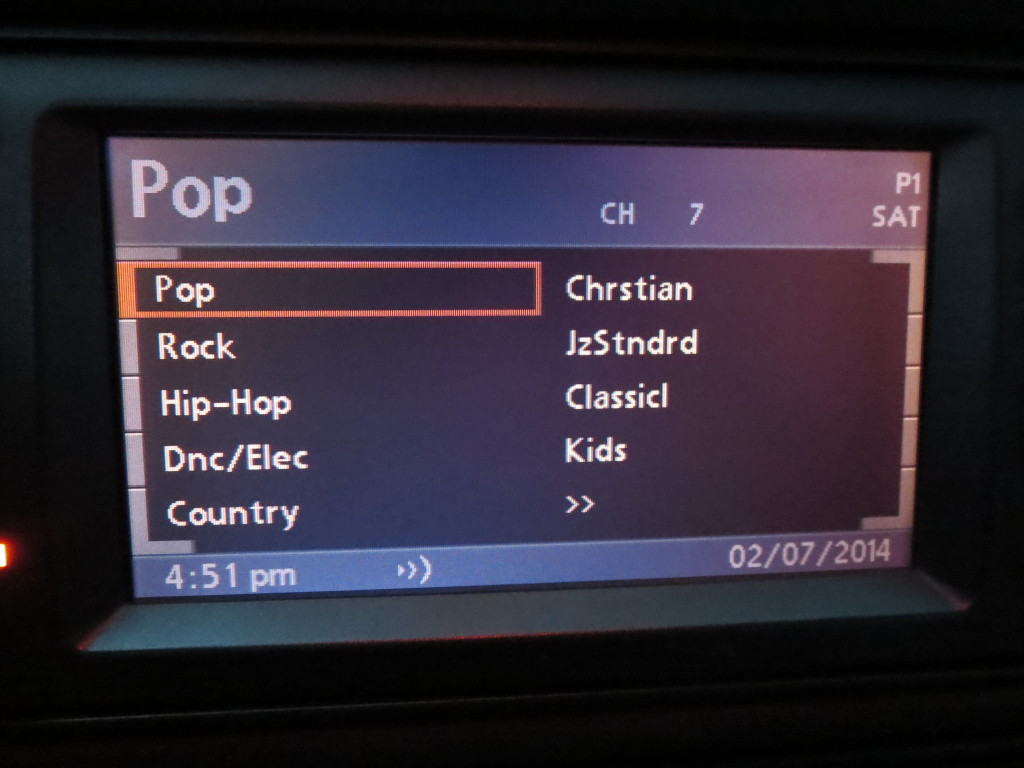
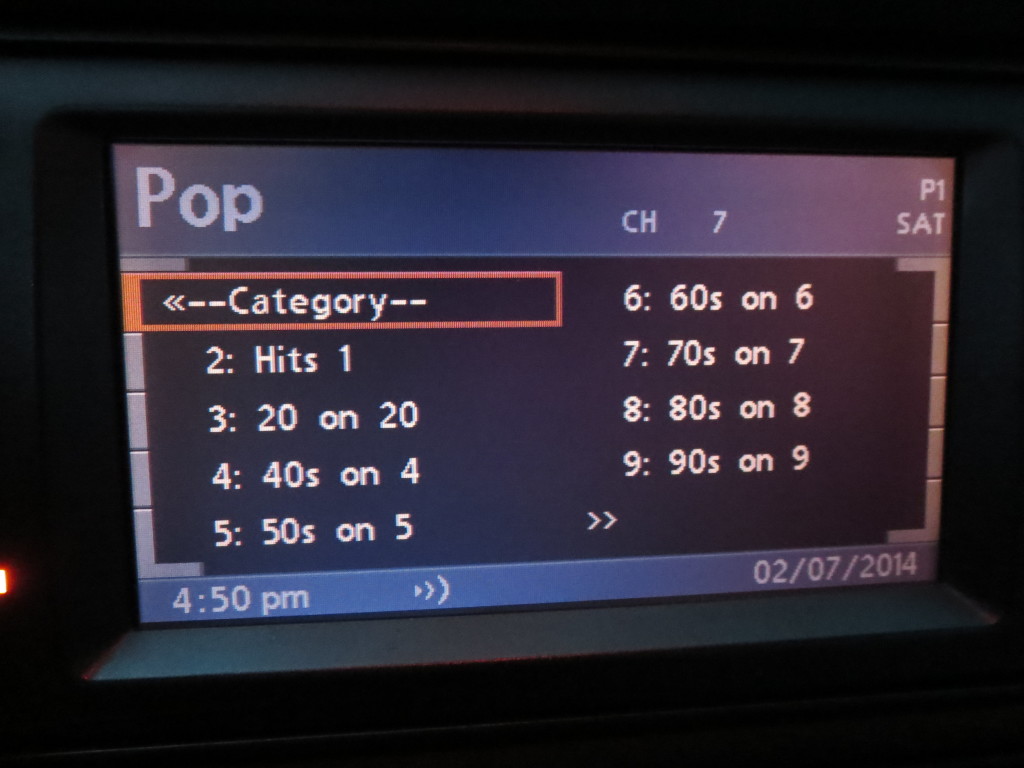
SIRIUS XM radio view when selecting a genre.
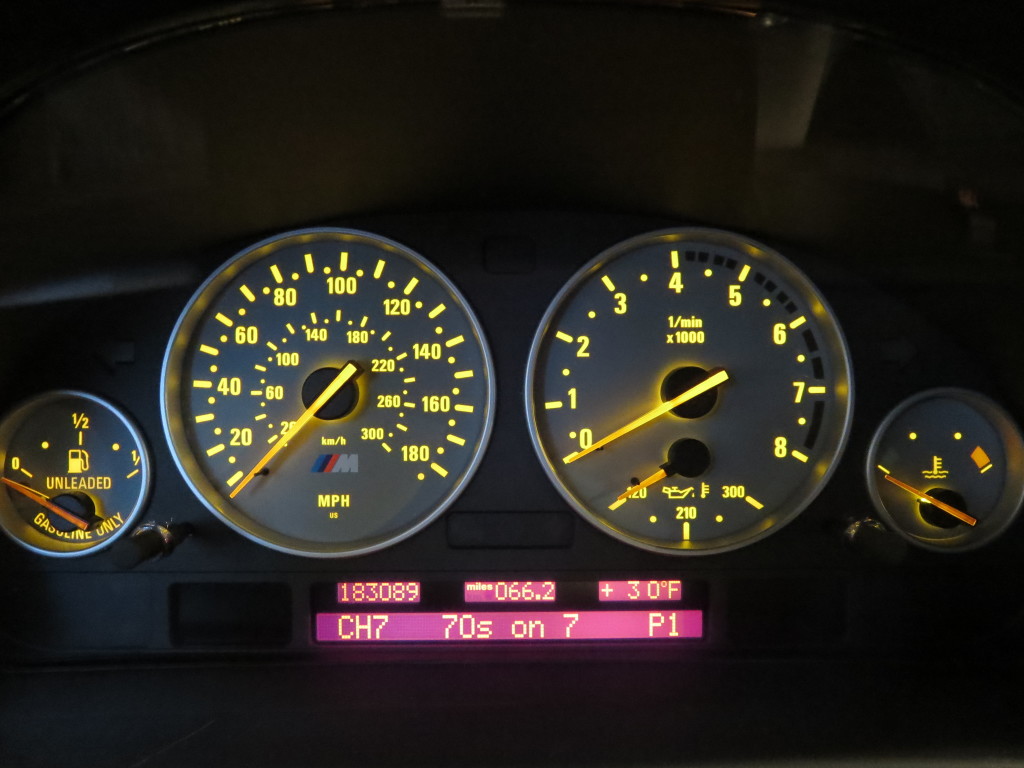
When changing SIRIUS XM channels, the new station, channel, and program number (if applicable) will display on the high OBC instrument cluster.
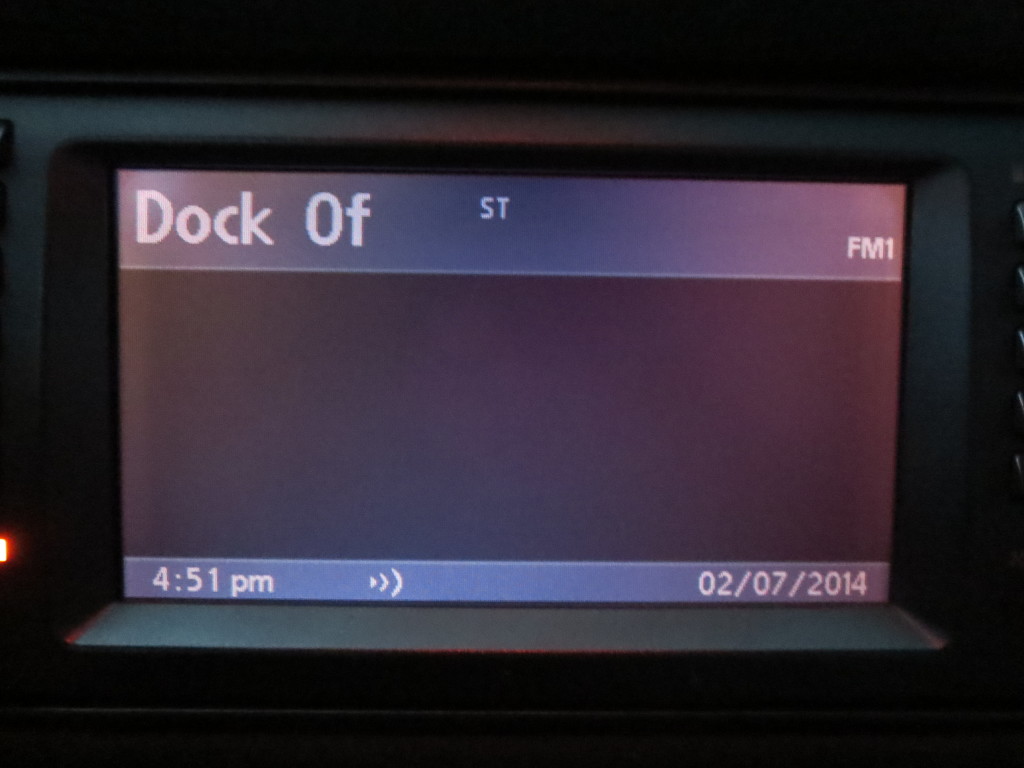
BM53 FM radio view, PTY and RDS turned on to scroll song and station information.

BM53 FM radio view, with select button pressed to review further options.
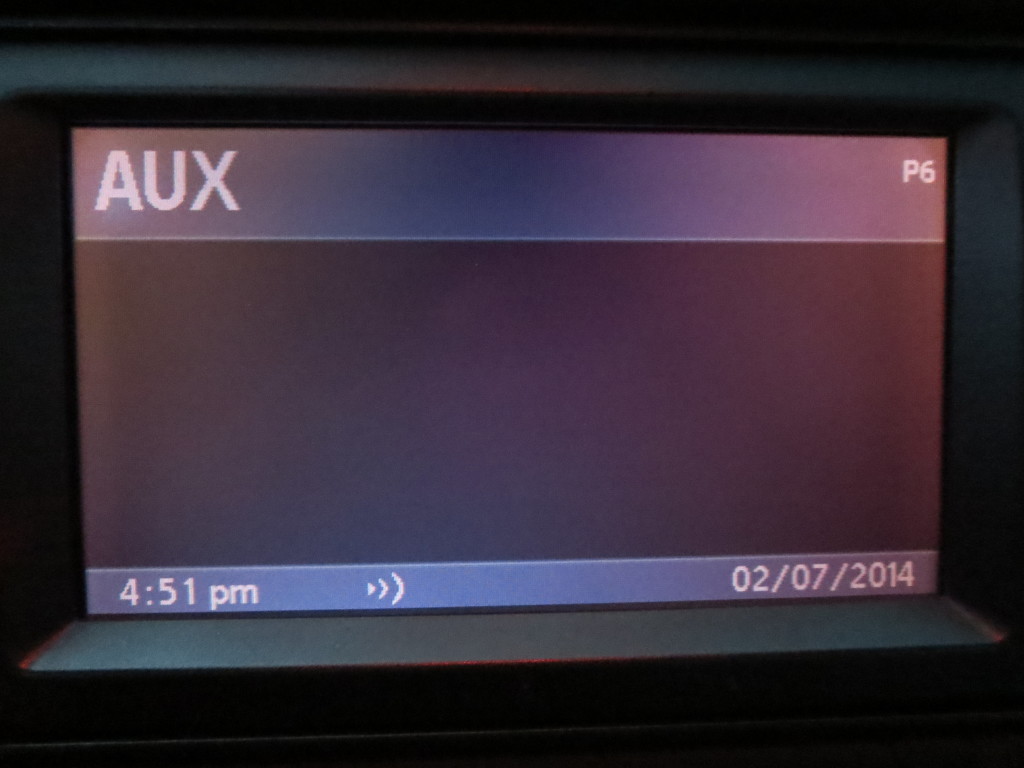
Auxiliary mode.
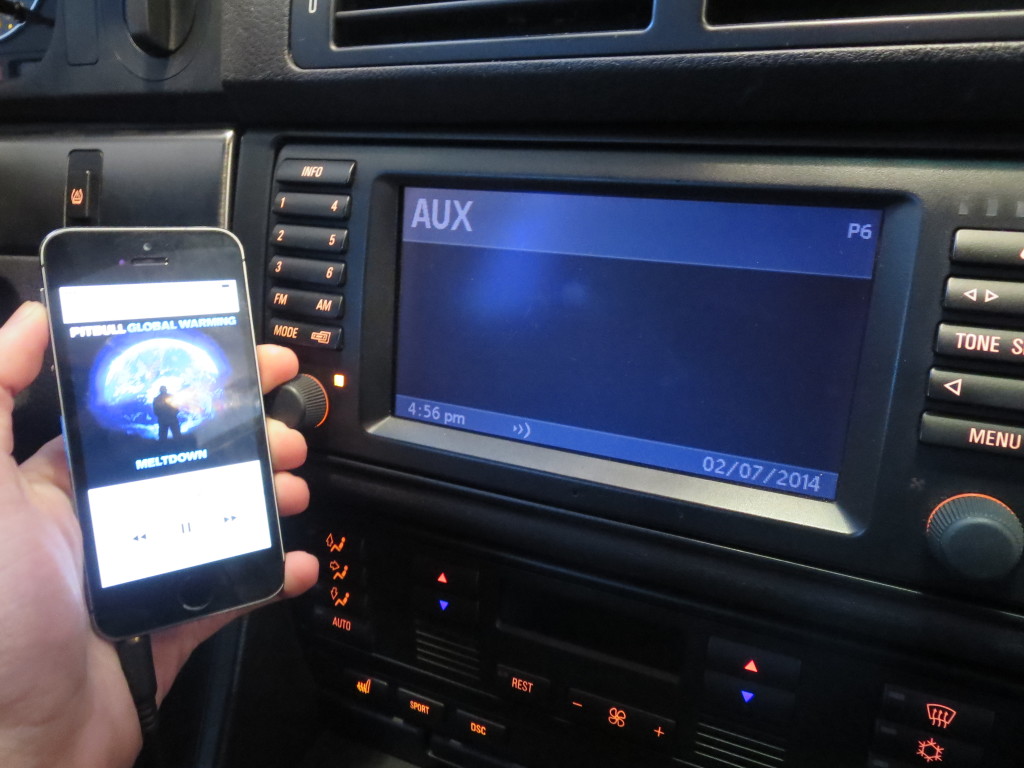
Auxiliary mode. My iPhone finally plays through the stereo!
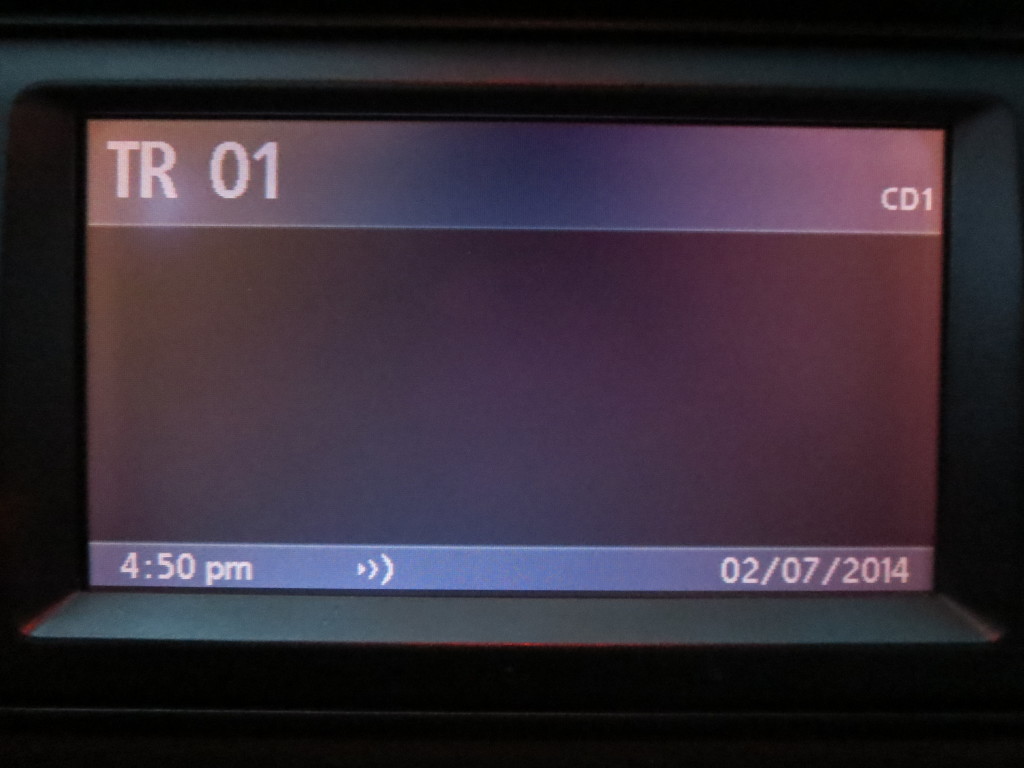
CD input: TR for track number, and CD for CD number with 6 disc changer. MP3 ID3 tags will be displayed if compatible 6 disc and BM53 radio are installed, and if you have a CD with song information written to it.
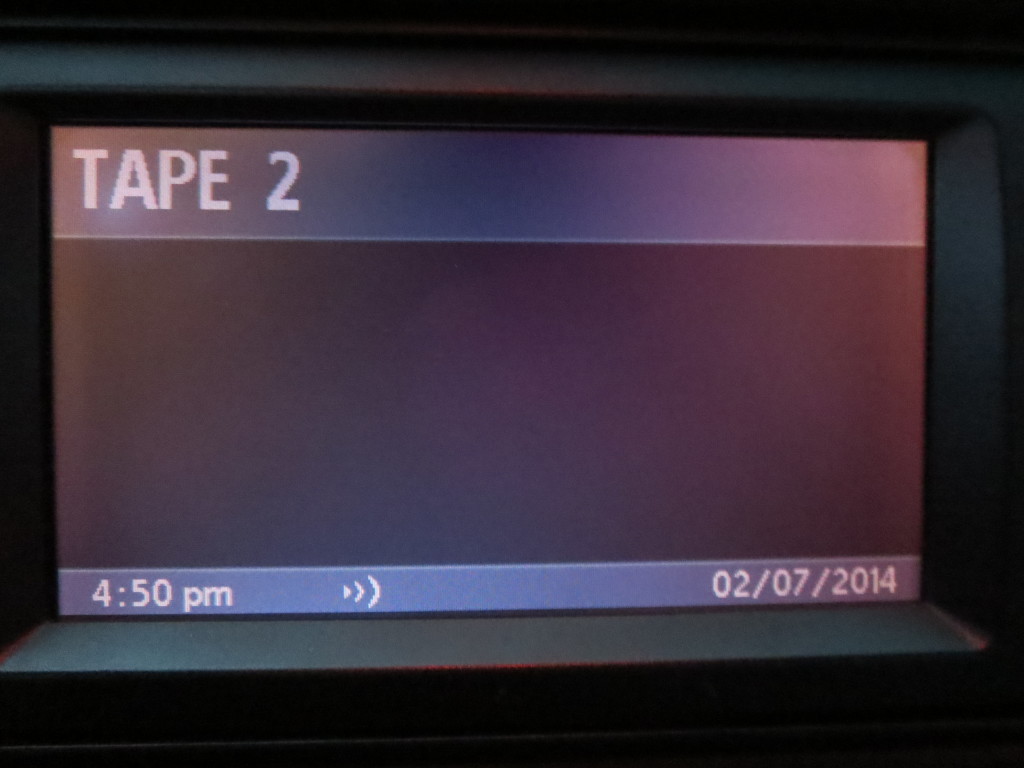
Tape input, tape side 2.
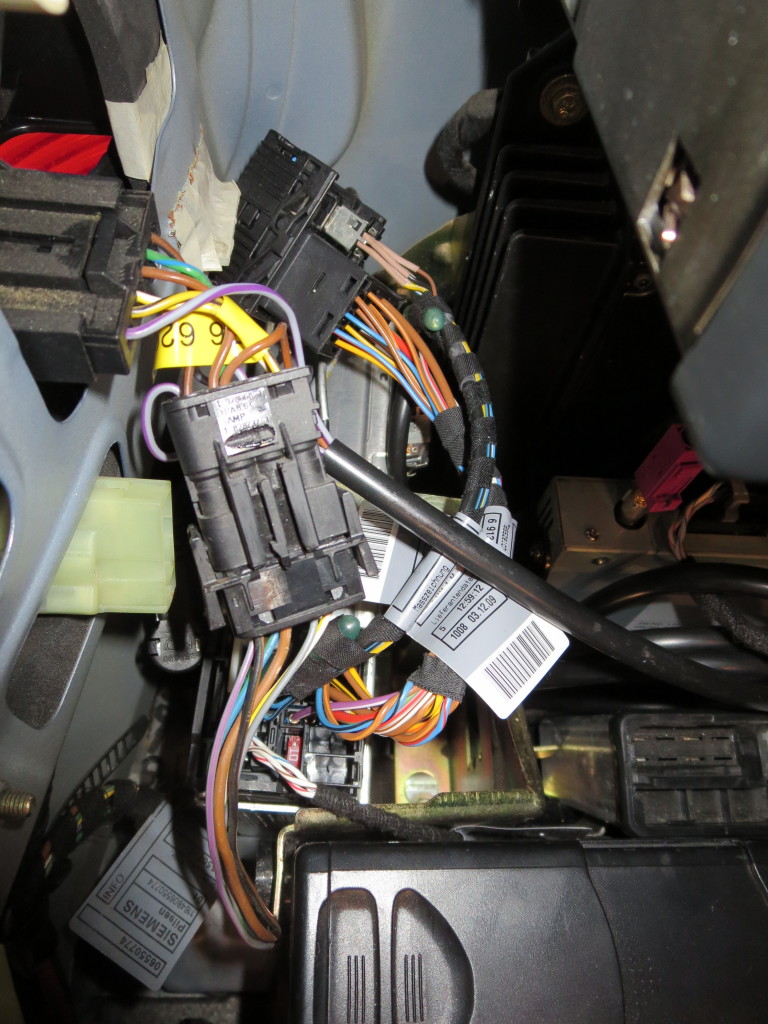
Messy wires. You can see those brown wires on the CD changer adapter cable for the BM53 radio.
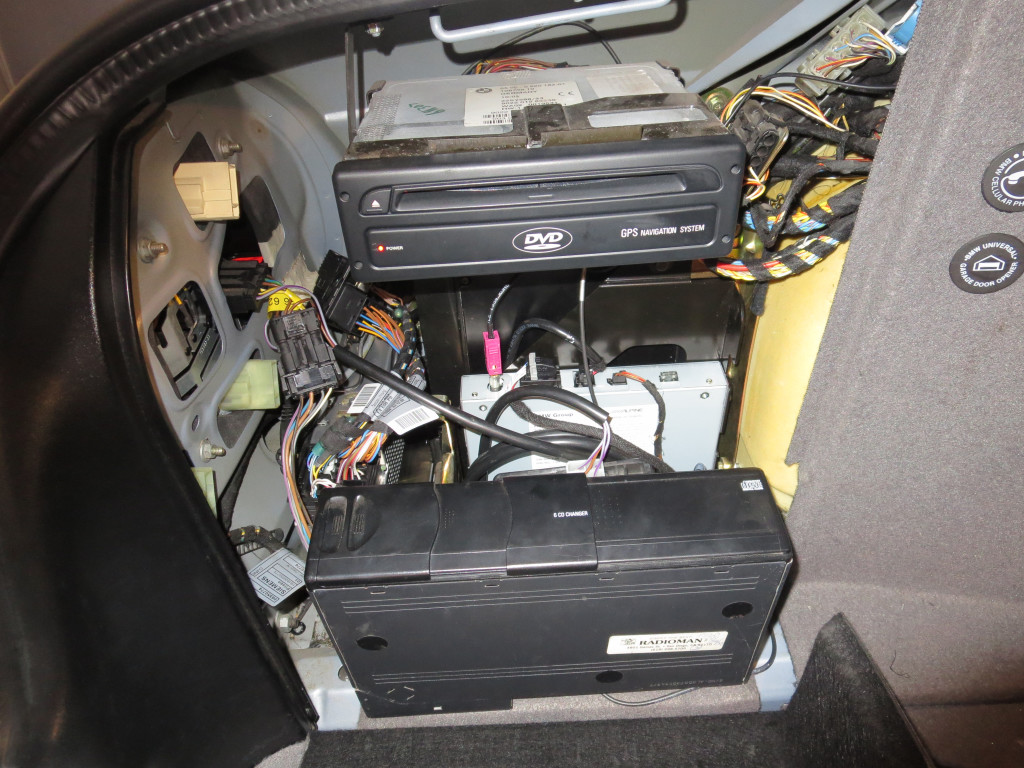
View of everything as it sits completed. The pink wire on the SIRIUS module (far left) is the antenna with two FAKRA adapters (I later discovered that I don’t need one between the pink antenna and the radio). One spot to the right is the CD changer slave cable. One more to the right is the DSP audio 6-pin, either from your CD changer before you started, the adapter that goes the car’s old 2×5 10 pin radio connector. Next is the 3-pin from the bottom of the CD changer originally. Far right is simply a fuse.

Completed trunk looking completely stock, everything is very well hidden.
E39Source Full DIY – BM53 Retrofit, Sirius XM, AUX Input on 02/2000 M5
Aux Input Install on 04/2002 530iA (Navigation)
Aux Input Install on 10/2000 525i/5 (Non-Navigation)