This is a minor item to facelift, but it was included in the E39 2001 model year refresh nonetheless. From 9/00 production, BMW replaced the REST button with a MAX AC button. But fear not, REST functionality is not lost! This article details how to properly retrofit the new HVAC panel and associated solar sensor.
Objective: Facelift HVAC panel to add MAX AC button and functionality.
Applicable Vehicles: 1997-2000 BMW E39 5-series: 528i, 540i, M5.
Subject Vehicle: 02/2000 BMW E39 M5, DE93 USA.
Preface: The REST button function is known to few. In fact, it took me several years of owning an E39 to definitively determine what it is for. REST in fact stands for residual heat. Pressing this button under the correct circumstances will allow the auxiliary water pump to pump warm coolant through the heater core, and continue to heat the cabin, even with the car/ignition switched off. This is useful under the right circumstances, say while pumping gas and leaving passengers in the car, or during a 5 minute trip into the store with passengers in the car during cold weather.
Per the owner’s manual: The heat which is stored in the engine is utilized for heating the interior when the engine has been switched off (while waiting at a railroad crossing, for instance). In ignition key position 1, you can alter the settings of the automatic climate control. With the ignition key in position 0, the system automatically directs heated air to the windshield, side windows, and foot wells. This function may be activated when the outside temperature is below approx. 59F (15C), the engine is at operating temperature, and the battery is adequately charged.
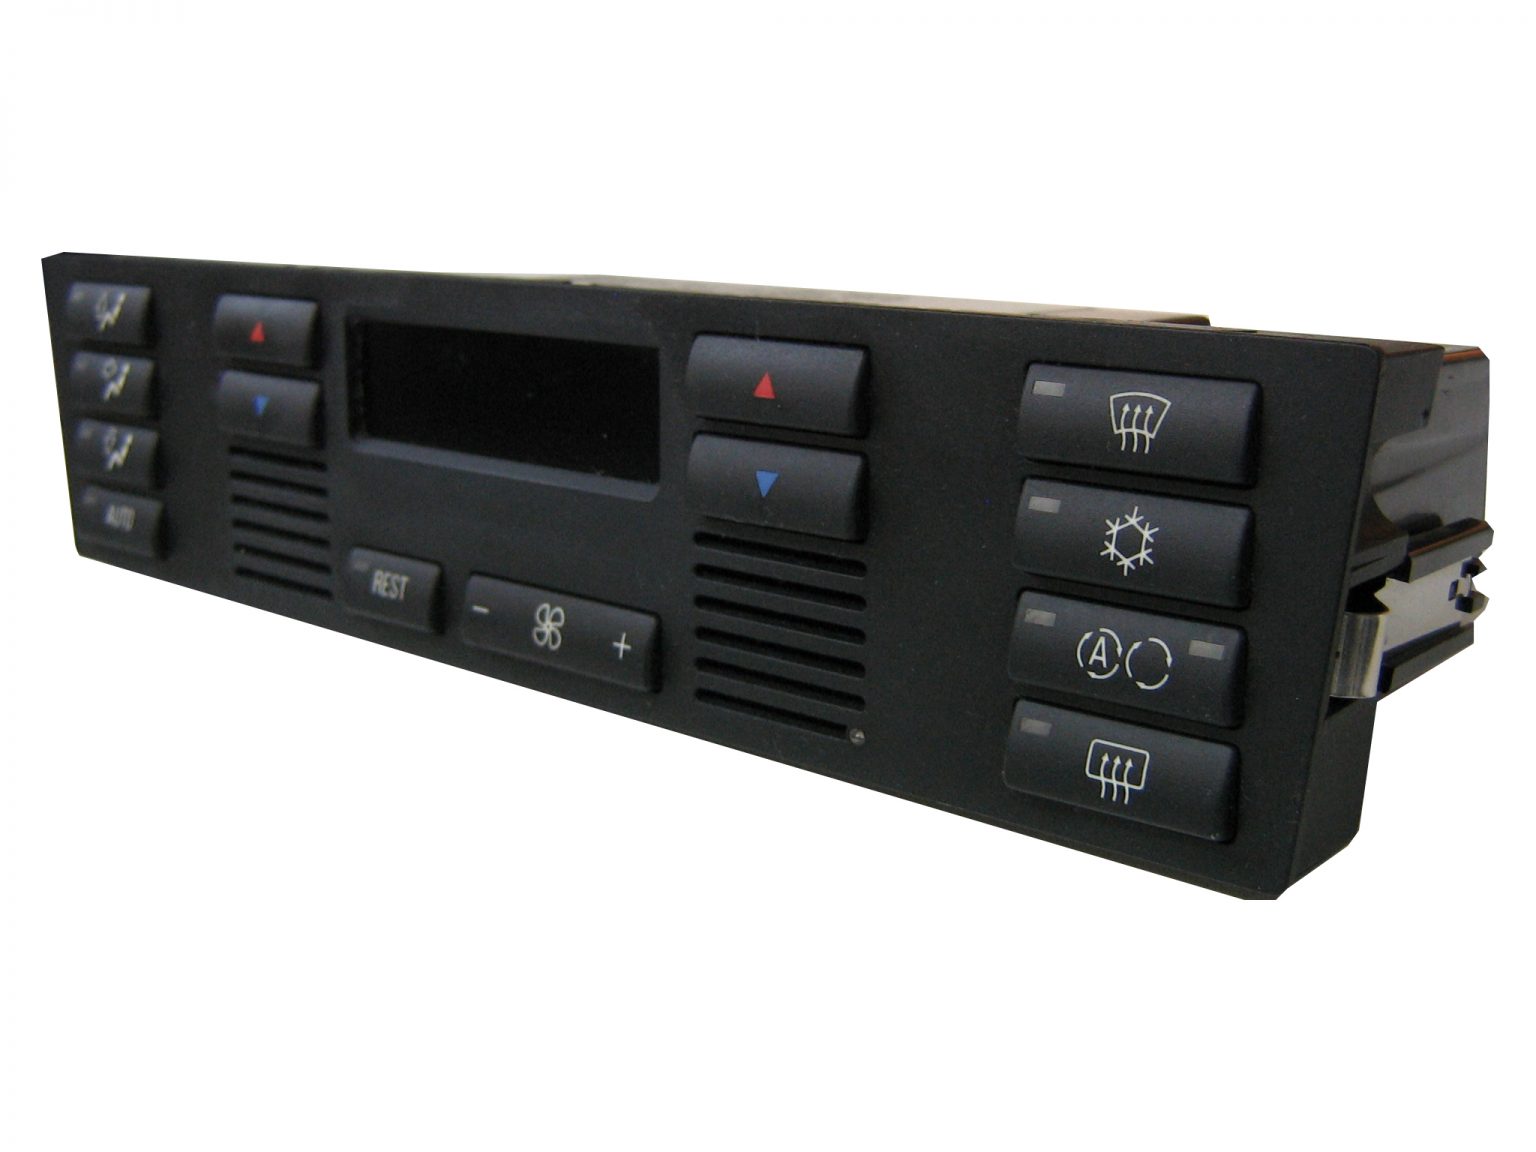
In 2001, BMW replaced this REST button with one labeled MAX AC. When the ambient temperature is above approximately 59F (15C) and this button is pressed, it automatically lowers both temperature zones to 60.0°, raises the fan speed to it’s maximum, and switches on the air conditioning. This is a very useful feature when returning to the car on a hot summers day. No more do you need to make 57 button presses to adjust the AC system to maximum. Once the cabin has cooled down, you can press the MAX AC button again to restore the previous settings, or manually adjust it as you see fit.
What people do not realize is that the REST function is still available with the newer HVAC panel. When below 59F, the MAX AC button acts as REST. Above 59F, and it functions as MAX AC. The best of both worlds.
There are two changes that we must make to enable the MAX AC functionality. Firstly, we must replace the HVAC panel with one that has the MAX AC button (and logic). Secondly, and to avoid stored codes in the AC module, we must retrofit the solar sensor. The solar sensor is that little bump up in the windshield air vent on the dashboard. It is pinned directly to one of the HVAC plugs. The wires run underneath the dashboard. Note: MAX AC will function without the solar sensor, but there will be two stored codes in the AC (HVAC) module: Solar sensor left, solar sensor right. Apparently, the singular solar sensor has two smaller sensors in it.
Parts Required: You will need one of the following HVAC panels, a solar sensor, and the solar sensor extension cable.
DISCLOSURE: This post may contain affiliate links, meaning when you click the links and make a purchase, we receive a commission.
PART NUMBER, DESCRIPTION FROM, UP TO
64116902547 HVAC Panel 9/1/2000 5/2/2001
64116915799 HVAC Panel 3/1/2001 10/16/2001
64116916641 HVAC Panel 9/1/2001 6/14/2004
64116927894 HVAC Panel 9/1/2003
64116901823 Solar Sensor 9/1/2000
- Solar Sensor Extension Cable
Tools Required:
Plastic non-marring pry tools
Jewelry-sized flat head screwdriver
Pick tool
Phillips screwdriver
Socket/extension assortment
Difficulty: Moderate. Remove upper dashboard to properly install solar sensor.
Time: 2-3 hours.
Procedure:
We need to remove the existing HVAC panel. You can do this very carefully with plastic non-marring pry tools. It is simply held into it’s frame with some spring clips. Gently prying it outwards will pop it out. Try to remove it evenly, so it will not bind. Alternatively, you can push it out from the rear. This would involve removing your MID/radio or navigation display to push from the top, or the cup-holders from the bottom. The choice is yours.
Unplug the various connectors that are seated into the HVAC panel. The smallest black plug just pulls straight out. The rest have tabs/levers that must be pressed/swung open. These are very typical connections, and are found in many places throughout various BMW models.
We can now wire in the solar sensor extension cable. The part numbers for these electrical pins are no longer listed on RealOEM. I would recommend sourcing the entire extension cable from a parts car. Feel free to contact me here with an inquiry for this part. The extension cable connects the solar sensor to the back of the HVAC panel. This will be a 4-pin cable. It plugs in directly to the solar sensor. At the HVAC panel, we will be pinning these wires into the largest, most-populated connector. With the cable disconnected, the outer ‘cover’ slides off once a tab is depressed. With the tab depressed, we can push the pins into the proper slots until they ‘click’ in place.
Purple/Brown (Solar Sensor Brown) – Pin 19 on HVAC
Yellow/Blue (Solar Sensor Blue) – Pin 15 on HVAC
Yellow/Black (Solar Sensor Green) – Pin 16 on HVAC
Y4. ellow/White (Solar Sensor Red) – Pin 14 on HVAC
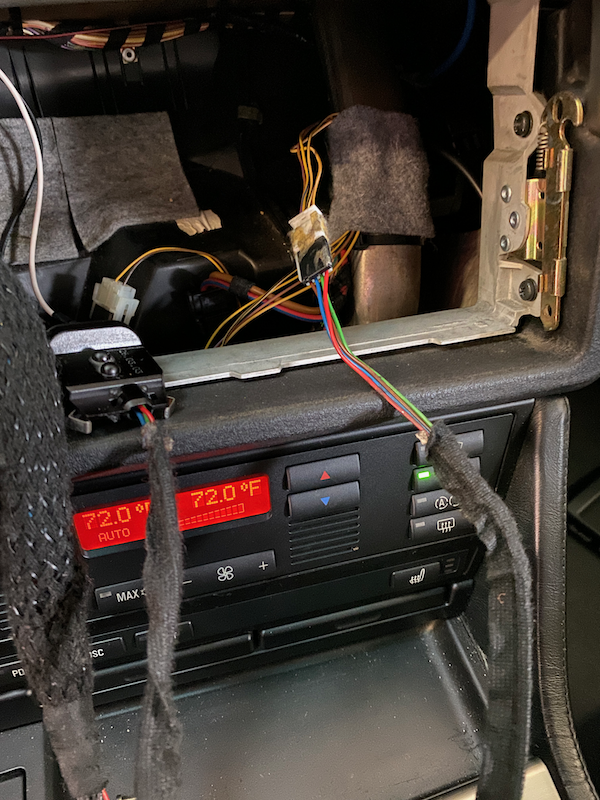
The red/green/blue/brown cable is the solar sensor. It plugs into the white connector (solar sensor extension cable) that then pins into the rear of the HVAC panel.
To properly install the solar sensor, the upper dashboard must be removed. To do that, please refer to this video (also embedded below).
The proper location for the solar sensor is in the windshield air vent on the dashboard. There are two slots to this vent. It should be mounted on the far driver’s side of passenger’s side vent. There will be plastic that must be cut out of this vent to make room for the solar sensor. The solar sensor has spring metal tabs on each side that will snap it into the opening. Be careful when cutting this opening, start small, and gradually make it wider until it allows the solar sensor to snap in tightly.
Install the solar sensor, and run the wire/extension cable underneath the dashboard down to the HVAC panel.
Re-assemble the interior/panels, and you’re all set!
Dashboard Removal: