For the 2000 model year, E39 M5s optioned with S508A Park Distance Control PDC included only 4 rear sensors. It wasn’t until the 2001 facelift that BMW added an additional 4 front sensors to the PDC option. This article and video content will detail how to retrofit the four front sensors to your 2000 BMW M5.
This article is a supplement to the primary DIY video posted at the bottom of this article. Reference that video to see the steps in action and for a better visual explanation.
Objective: Retrofit front parking sensors on an E39 BMW 5-series presently with rear sensors from the factory.
Applicable Vehicles: 1997-2000 model year BMW E39 5-series: 528i, 540i, M5.
Subject Vehicle: 02/2000 BMW E39 M5, DE93 USA, with S508A Rear PDC factory option.
Parts Required: All of the parts required to complete this retrofit are listed in the table below.
DISCLOSURE: This post may contain affiliate links, meaning when you click the links and make a purchase, we receive a commission.
PART NUMBER, QUANTITY, DESCRIPTION, PRICE:
51118172386 1 Front bumper carrier with front PDC outlets $495.14
51118174185 10 Front bumper carrier pop rivets $9.90
66206989068 4 PDC Sensor $144.16 - $629.88
61120027997 1 Front PDC wiring harness $135.20
51117894139 1 Left impact strip, M5 bumper, PDC support $34.55
51117894140 1 Right impact strip, M5 bumper, PDC support $25.39
66209129816 1 PDC module, with front and rear support $372.86
61130006663 5 Wiring pins center console switch and PDC harness $19.60
61130007571 1 Wiring pin for gong speaker $3.92
61131378460 1 Pin housing for gong speaker $4.26
Various** 1 Center console switch panel, PDC Support ~$100
61319352253 1 PDC switch (EARLY CARS) $57.19
*These parts can be purchased on Ebay, or from forums such as M5Board for significantly cheaper. I simply linked the OE/OEM brand new ones at their list prices. I was able to complete this job for about $600 (today) myself.
**Each center console switch panel has a different part number. There are many buttons that this panel can have, you are aiming to find the one that retains all of the buttons that you have now, plus a PDC button. I just used eBay and found the correct layout of buttons that I needed, and purchased that model.
The above prices are quoted from ECS Tuning. Other vendors may vary in pricing. Figures updated April, 2022.
Difficulty: Moderate. Routing wires through interior and dashboard, custom-pinning a few harnesses.
Time: 6-10 hours.
Additional Material (optional): This is the official BMW technician installation guide for front and rear PDC installation. It offers technical diagrams and instructions to retrofitting the PDC system as a whole. Here is the official BMW technical installation guide for rear PDC only.
Older Cars:
On very early E39s, the center console switch buttons are individual, like pre-facelift E38s. You will need this switch. Since this is an E38 switch, instead of using X580 use X908, and instead of X704 use X217. Pins 19 and 22 should be 10 and 7 instead. A pinout of the switch is available here. The connectors on the PDC module could also be different. These connectors can simply be re-pinned to the newer style of connector, and then plugged into the newer module.
Procedure:
A) Front parking sensor installation, wiring to trunk
I began the job by installing the 4 parking sensors into the front bumper. You must first remove the bumper in order to replace the bumper carrier. The bumper carrier is the steel reinforcement inside the bumper. We must replace this part because vehicles with front PDC used a carrier with holes in it to accommodate the 4 sensors. The part number for the carrier is 51118172386. Refer to the E39 M5 Rear Bumper Removal video below in addition to the PDC Retrofit DIY videos below to see the steps for removing the front bumper and changing out the carriers. This is not difficult, but it is a two person job. The bumper carrier is held into the plastic bumper with several of BMW’s standard black plastic pop-rivets, part number 51118174185. Remove the clips, exchange the carriers, and replace the clips with new ones to hold in the new carrier.
If your bumper does not have pre-cut holes for the PDC sensors, you must cut them. In the M5 bumper, you can drill the holes and they will be covered up by the black plastic impact strips that house the sensors. You also have the option of replacing the bumper with a bumper that has pre-cut holes for the sensors. I used a 1.25″ drill bit, and drilled from the bottom through (very carefully) to make the holes in the bumper. Line up the impact strips so you can see right where the holes need to be, and be careful not to damage the exterior finish of the bumper.
You can now insert the impact strips with PDC holes (51117894140 right and 51117894139 left for the M5) back into the bumper, and install the 4 PDC sensors (66206989068) into the impact strips. Now we’re ready to get the front PDC wiring harness (61120027997). Plug the sensors in, and route the harness into the engine bay.
Keep in mind that the harness needs to start on the passenger side with the first sensor, and end up with the remaining length and connector in the passenger’s side of the trunk where the PDC module is. I ran the harness down the passenger’s side of the car, and into the trunk where the PDC module (66216916406) sits behind the carpet door. BMW specifies that the harness should be run down the driver’s side, and then across the trunk underneath the carpeting to the module. This would probably be easier than what I did, seeing as there are easier ways to get through the firewall on the driver’s side. I was able to get the harness up to the firewall myself. From there, I had a local BMW independent shop wire it through the firewall, through the interior, and into the trunk. They took apart the blue connector on the harness, and fed the wires through the DME box (under passenger’s side cabin air filter box) and then under various pieces of trim and carpeting through the rest of the car. This is the only part of this job that I did not complete myself.
Reinstall the front bumper. You now have the front of the car finished, and we’re ready to do some minor wiring modifications to get the setup to work.
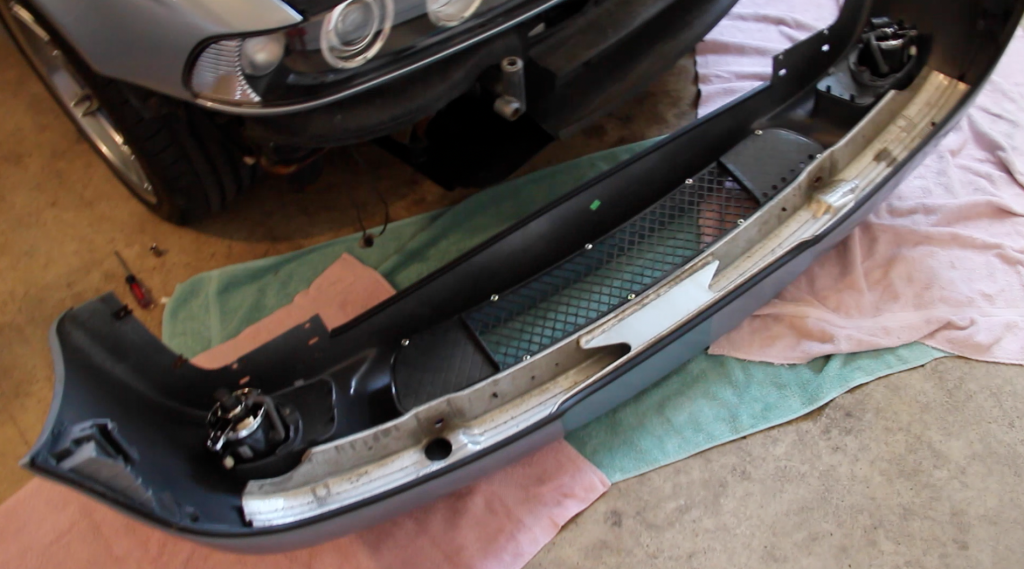
See how the bumper carrier fits into the bumper once it has been removed.
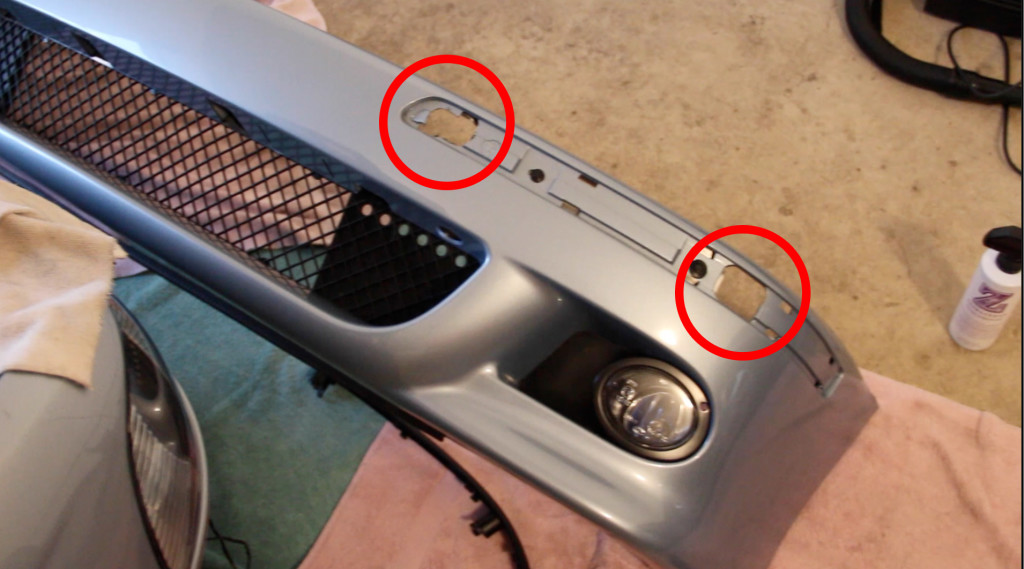
Holes drilled for sensors in M5 bumper (hole on right was already there)
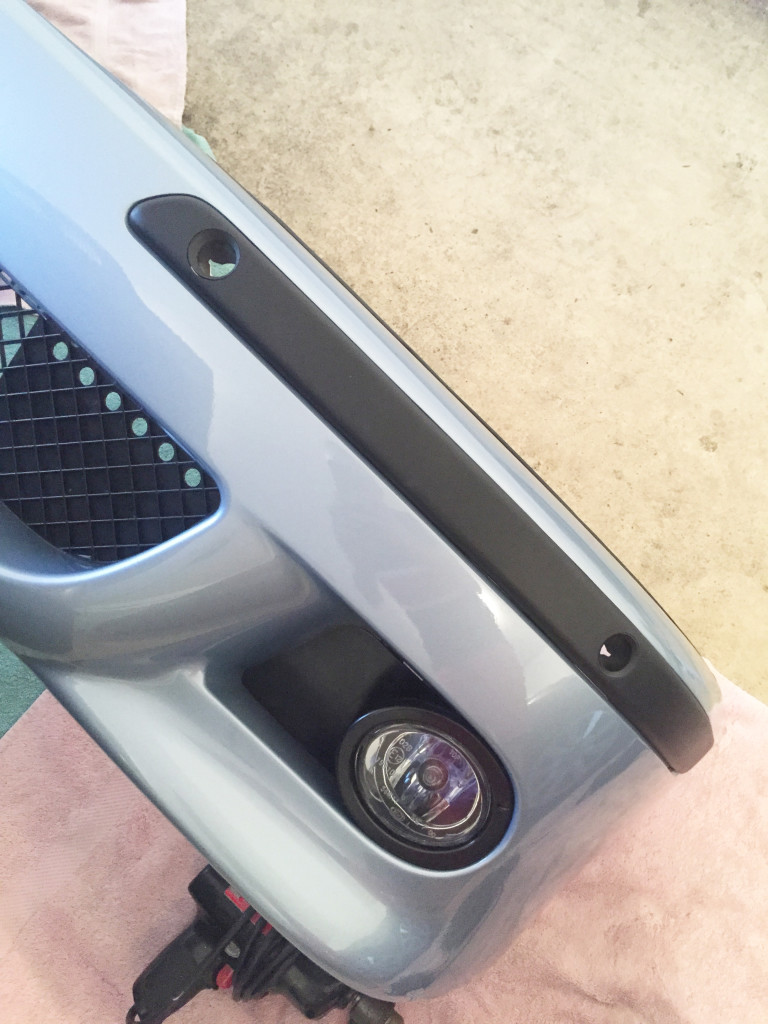
M5 front bumper with new carrier, drilled holes, impact strips, and front PDC sensors.
B) Wire center console switch to support front PDC
Vehicles with front PDC have a modified center console switch panel to incorporate the control button to toggle on/off the PDC system. Note that it will automatically turn on when you select reverse. You must replace this panel with the correct panel that retains all of your existing buttons, plus the PDC button. My car originally had the 2 heated seat controls, the Sport button, and the DSC button. I sourced a panel that had those buttons, plus a PDC button from Ebay, for around $75.
Pop out the old panel by first removing the HVAC panel (the panel that has the temperature settings, fan control, vent options, etc). You can pop this out with a plastic pry tool, it is just held in with springing metal clips. Reach into this opening, and push out on the switch panel to remove it. You can alternatively remove the cup holders by opening each side 1/2 way and removing the phillips head screws, and then reaching up to pop out this panel. There is one large harness that plugs into the switch panel. Depress the clips on each far end, and wiggle the harness off of the center switch panel.
Back in the trunk, the PDC module that came in rear only PDC cars has two connectors. Black (power, bus, speaker signals, reverse signal) and white (rear sensor harness). This must be replaced with a module that supports front PDC, and adds a blue connector (front sensor harness) in addition to the black and white connectors. I used part number 66216916406 for the updated module. These can be purchased from Ebay for around $50-$100. Keep in mind that there are many different part numbers that will work, any module that looks like the 66216916406 and has the black, blue, and white connectors should work. We must connect pin 7 on the black PDC module harness to pin 8 in the center console switch. We must also connect pin 10 on the black PDC module harness to pin 9 in the center console switch. You will need 5 pins, part number 61130006663. I will mention that these pins are very fragile, and are easy to break. I ended up buying 7, using 5, and breaking 1. These come from BMW with the pin to be inserted into the connector, and approximately a 16 inch lead of 18-gauge wire already attached to them. Pull off the bulky part of the black PDC module harness to simply press in the new pin leads to pin 7 and pin 9. The bulky part of the harness has a clip, and slides off. Back in the center console, open up the center console switch harness by sliding off the black part from the connector. Insert the other 2 pins (61130006663) into pin 8 and 9 of the center console switch. Now it’s just a matter of sourcing approximately three 25 foot lengths of 18-gauge wire to finish bridging the connections between the trunk and center console. I attached the wire lengths to the pin pigtails with 18-gauge terminal connectors, and crimped them with wire crimpers. You could also use heat-shrink, and/or solder. Now run these wires under the trunk carpeting, behind the seats, and behind various interior trim pieces until they end up in the center console. Use more terminal connectors there, and now you have wired the center console switch to the PDC module.
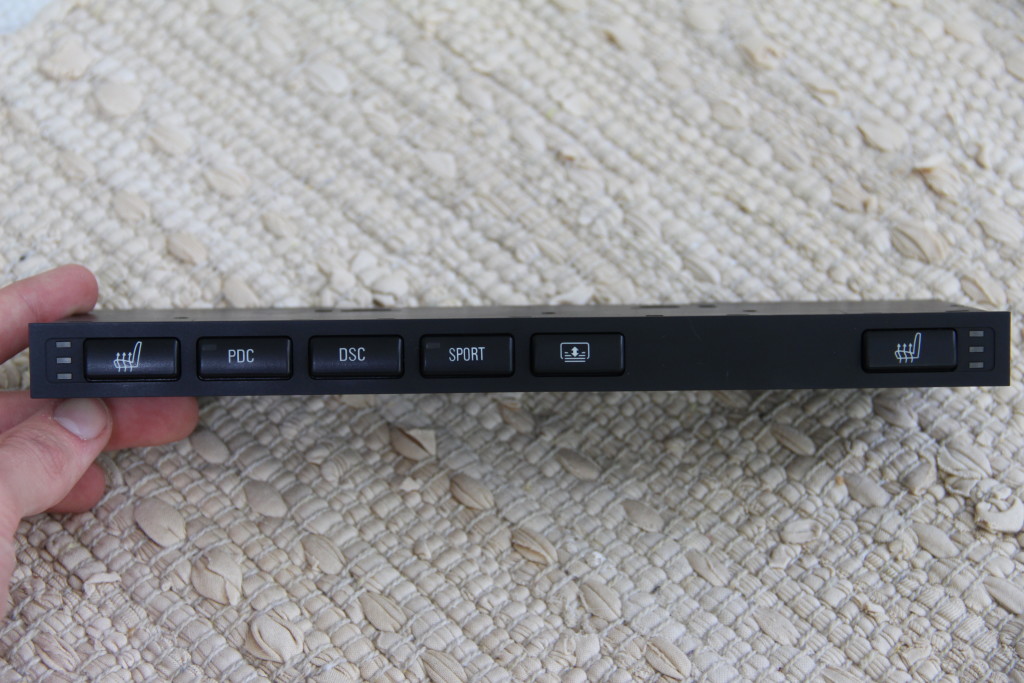
This is the center console switch. You will need to find one that retains all of your current buttons, but adds that PDC button as well.\
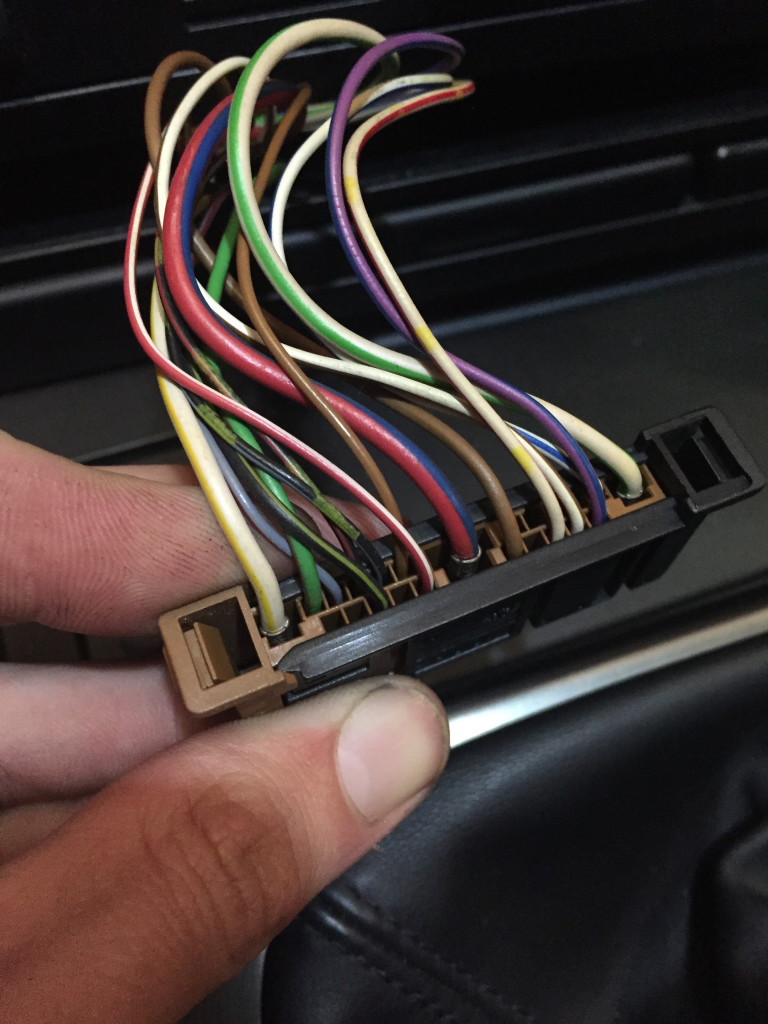
This is the black harness in the trunk that plugs into the PDC module. I have already removed the housing with the lever, which simply pulls off when you release a clip. We will be inserting pins 7, 9, and 10 here with 61130006663 pins.
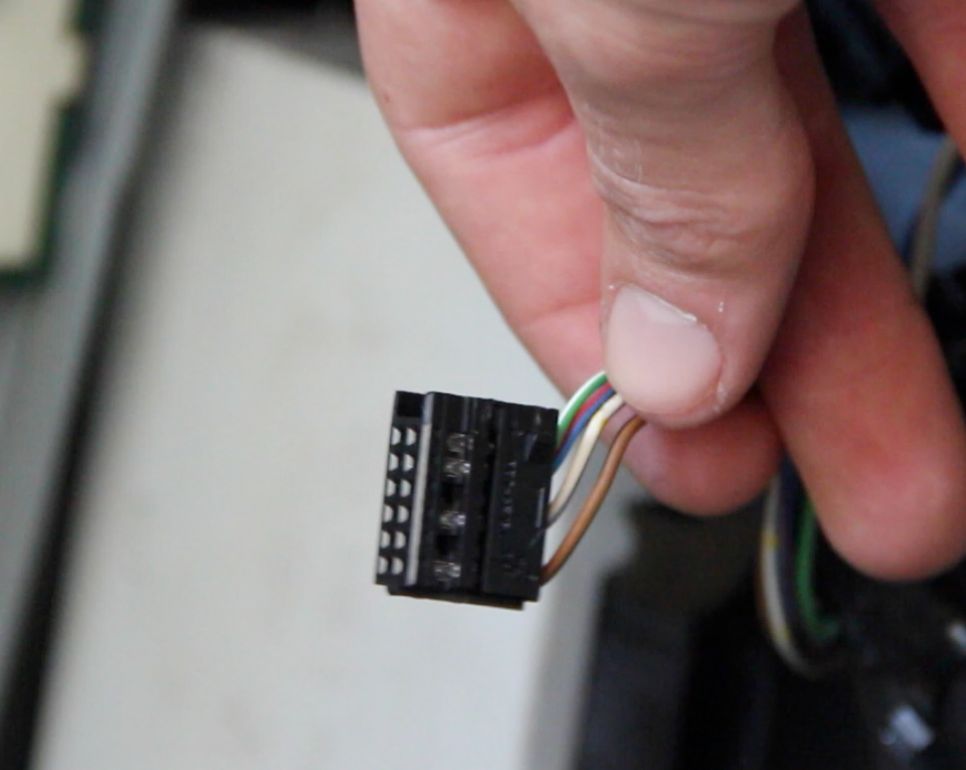
This is the harness that plugs into the back of the center console switch. You will slide the black part off to the right of the brown part to gain access to the pins. We will be inserting pins 8 and 9 with 61130006663 pins.
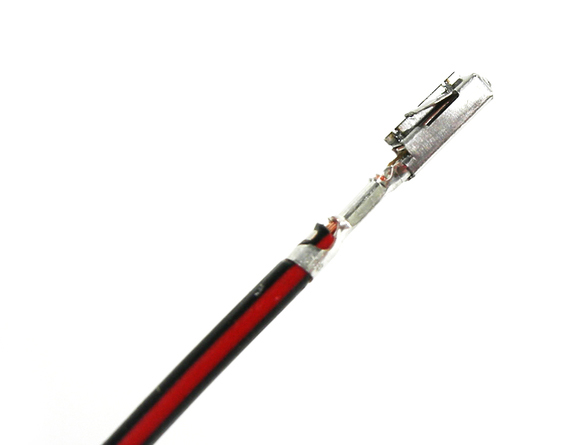
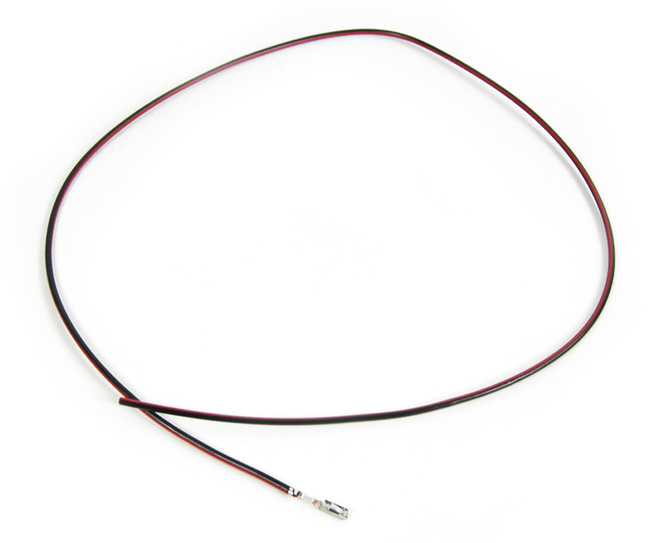
This is part number 61130006663. (3) will insert into the black PDC harness pins 7, 9, and 10. (2) will insert into the center console switch pins 8, and 9.
This is part number 61130006663. (3) will insert into the black PDC harness pins 7, 9, and 10. (2) will insert into the center console switch pins 8, and 9.
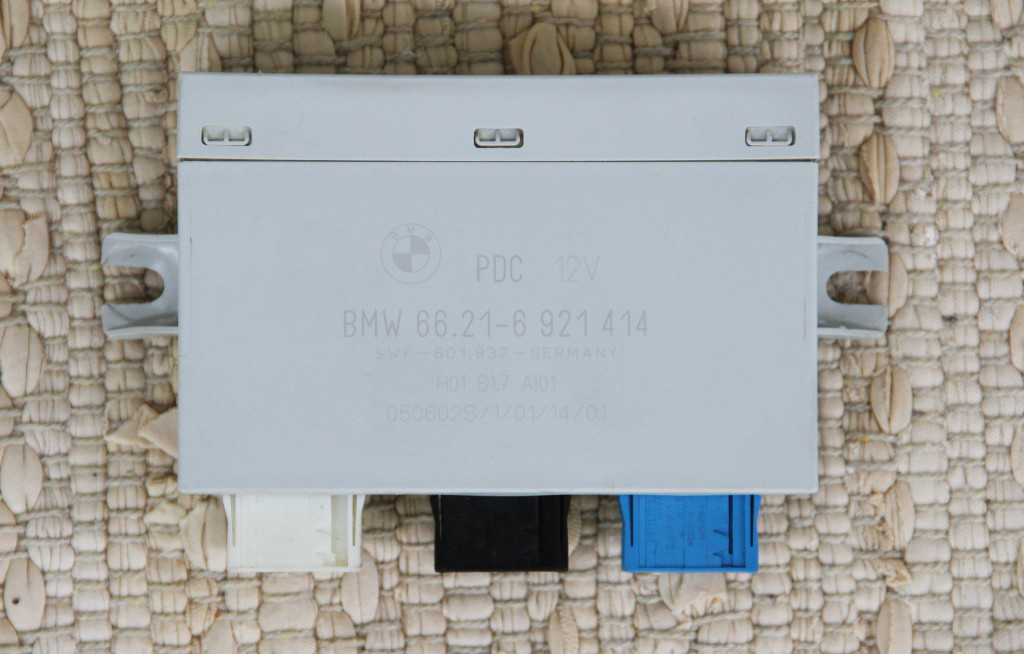
PDC module that supports front PDC. I used 66216916406, but anything that looks like this should work.
C) Wire front gong speaker to PDC module
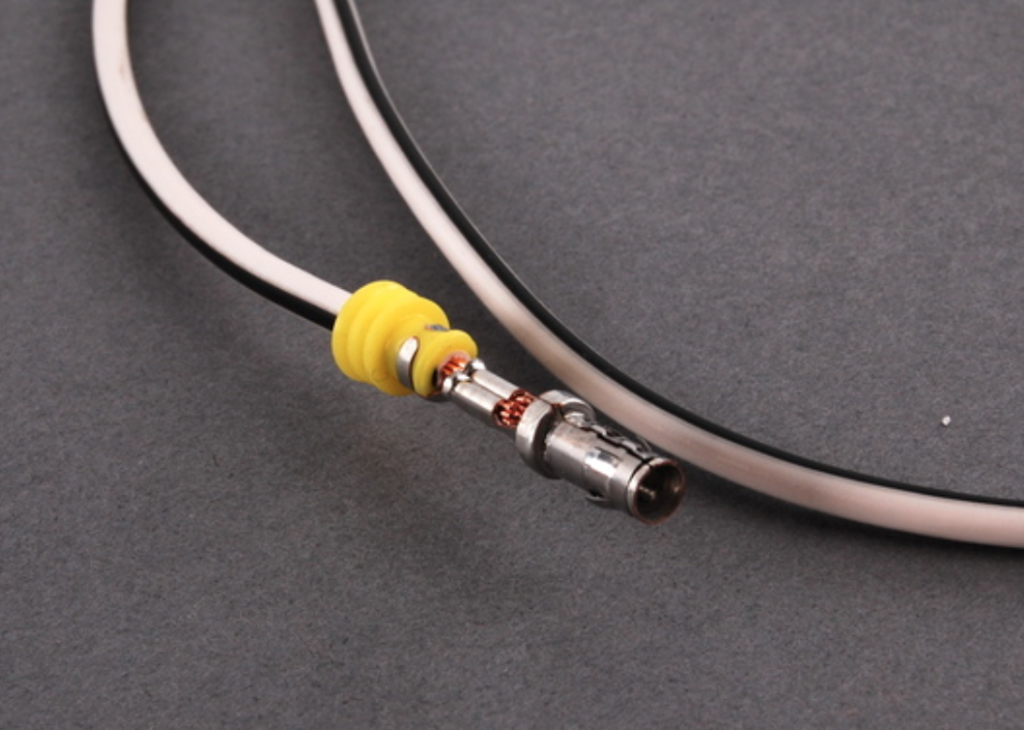
On the black PDC module harness, we need to add pin (61130006663) to plug into pin 9. This will run to the T4 pin on the front gong speaker. The front gong speaker pins, just like all of the other harnesses we’re toying with, are well labeled so finding the correct pin numbers should not be difficult. There are two parts to the pin for the front gong speaker, 61131378460 for the housing, and 61130007571 for the electrical contact pin itself with the 16 inch or so lead. Run this third wire just as the other two through the interior, but stop in the driver’s foot well, where the gong speaker is located. Make the connections with terminal connectors, plug in the new pin (61131378460 for the housing, and 61130007571 for the electrical contact), and the system will be ready for a test.
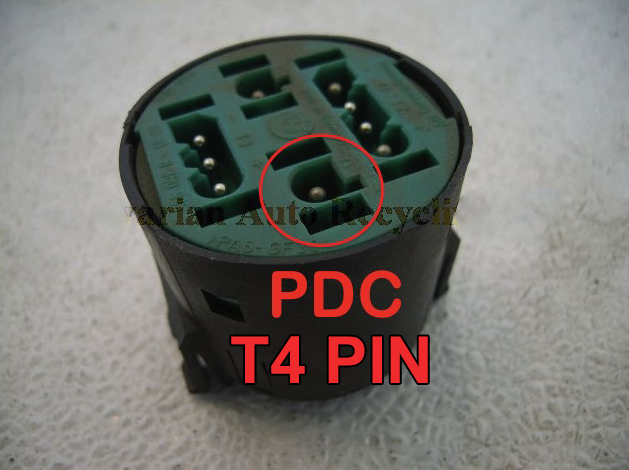
Front gong speaker, removed, T4 front PDC pin circled.
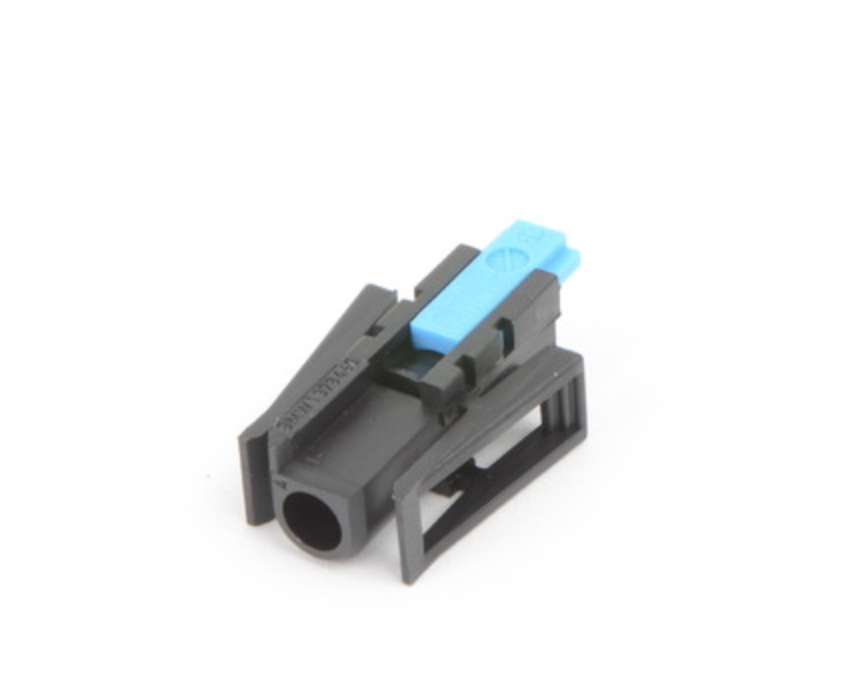
This is part 61131378460. This will plug into pin T4 on the front gong speaker.
This is part 61130007571. It will plug into the housing (61131378460) that plugs into pin T4 on the front gong speaker.
D) Reassemble interior, test system
Providing all of the proper connections have been completed successfully, your 1997-2000 model year BMW 5 series should now have functioning front sensors in addition to the rear.
E) Troubleshooting
If you go to activate the system and hear a long solid beep, this indicates that the system has been disabled due to a fault. Unless, of course, you are parked very close to something and it is simply indicating that. If your system is disabled, check all connections to make sure the proper pin paths have been taken. Also, activate PDC and listen to each sensor for a faint clicking sound. A working sensor will click when it is activated. A dead sensor will be silent, and would be enough reason for the system to disable itself. If you come across a dead sensor, it could pay to swap it with a known working one to insure that it is just the sensor that is faulty and not the wiring harness. Replace a dead sensor, and reevaluate.
If the system is still disabling itself, you can try a battery reset. Simply remove the negative terminal from the battery overnight, this will allow the vehicle’s modules to reset themselves and their temporary memory. Reconnect the battery terminal the next morning, and try again.
If you are still unsuccessful, you may need a dealer or shop to code the new PDC module specifically for your car. Note that my vehicle did not require this to be done. But with all of these cars being slightly different, it is possible.
For the official BMW technician installation guide, review this PDF. It offers very technical wiring diagrams and instructions for retrofitting the PDC system as a whole.
Be sure to watch the videos below, as they will answer many questions and help you better visualize what is being done here. Good luck, and enjoy!
Front PDC Retrofit – Complete DIY
E39Source Front Bumper Removal & Replacement DIY